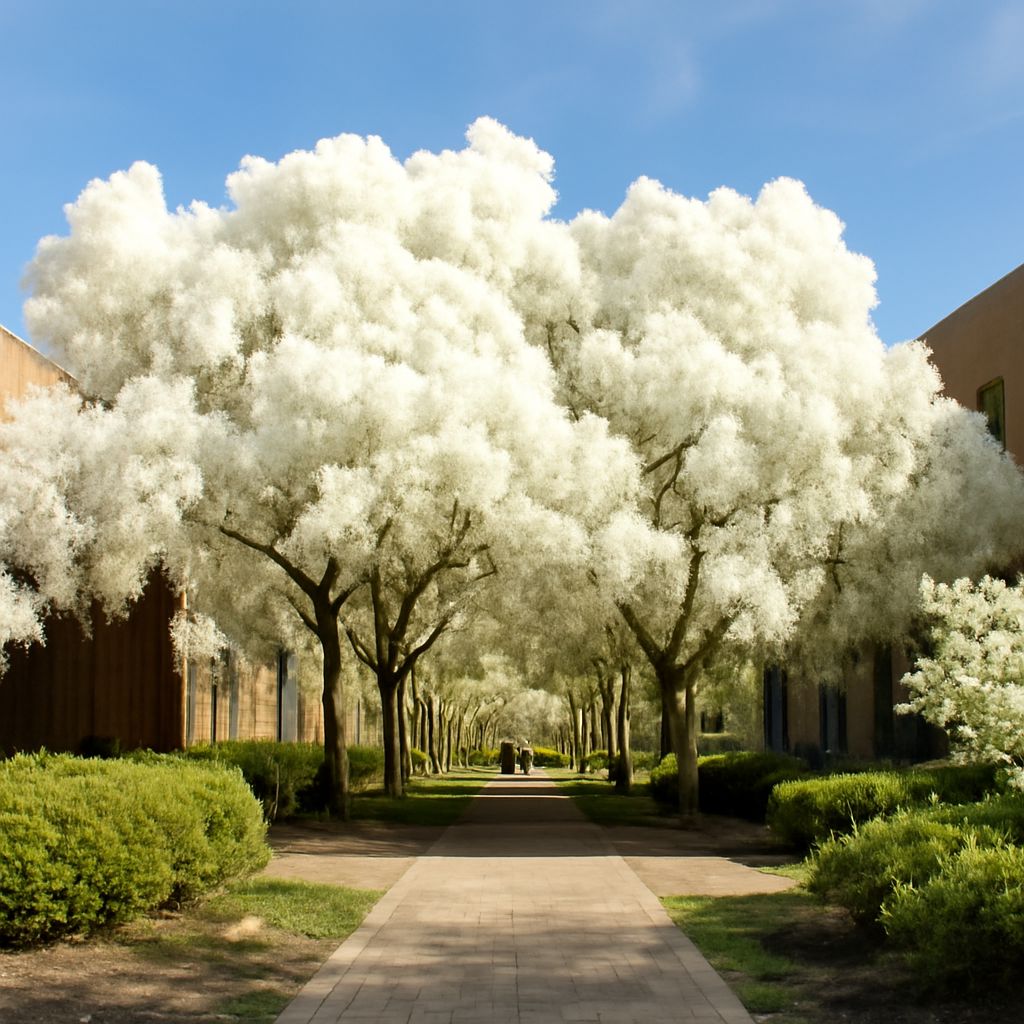
Imagine capturing landscapes where foliage shines white and skies turn deep, dramatic black. That’s the magic of infrared filter photography—opening new dimensions in your creative work. By adding an infrared camera filter to your kit, you unlock a hidden world that your eyes can’t see, letting you craft images that truly stand apart.
Whether you’re experimenting with a traditional IR filter or exploring the latest in infrared filter technology, understanding the right tools and editing steps is crucial. Ready to master IR filter photography? Let’s break down exactly how these filters work and how you can use them to create unforgettable images.
Understanding Infrared Filter Technology
The heart of infrared filter photography lies in how an IR filter blocks visible light while letting infrared wavelengths pass through. Standard digital cameras usually have a built-in IR-blocking filter, so adding a strong external infrared camera filter is necessary to reveal that hidden spectrum. This filter allows your sensor to record only the infrared light, turning ordinary scenes into surreal visions.
Most infrared filters are measured by their cutoff wavelength, such as 720nm or 850nm. The lower numbers let in a small amount of visible red light, while higher numbers block almost all visible light for a purer infrared effect. The material and coatings on the IR filter also affect transmission and image quality, so it pays to research filter specs before buying.
Handling and cleaning these filters is different from your typical glass. The coatings are often delicate, so always use a blower and microfiber cloth, never rough paper or fabric. Store your infrared camera filter in a dedicated pouch to prevent scratches or dust that could degrade your images. Familiarity with these technical details gives you better control over your creative results.
Paraphrasing, the science behind an IR filter is not only fascinating but also practical—once you understand how it manipulates wavelengths, you can experiment more confidently with exposure, white balance, and composition. This hands-on familiarity is what sets apart an average shot from a masterpiece in IR filter photography.
Choosing the Right IR Filter for Your Camera
The first step to great infrared filter photography is matching the right IR filter to your camera. Not all cameras respond equally to IR; some have stronger internal blocks than others. Research your camera model—some older DSLRs or mirrorless models are easier to adapt, while new models might need modification.
IR filter options vary in thread size, cutoff value, and construction quality. For beginners, a 720nm infrared filter is a versatile choice, providing that classic, dreamy look without making post-processing overly complex. If you want deeper black-and-white contrasts, try an 850nm IR filter, but be aware that these require longer exposures, often 30 seconds or more, especially in shaded scenes.
Before purchasing, check if the IR filter threads match your favorite lens, or buy step-up rings to adapt. Budget IR filters can introduce unwanted color casts or vignetting, so invest in a reputable brand—Hoya, Kolari, and B+W are proven choices among infrared enthusiasts. If you plan to shoot handheld, look for a slim, multi-coated filter to reduce flare and make cleaning easier.
Trying different filters helps you discover your preferred style. Remember, some IR filters will work better in bright sunlight, while others excel on cloudy days. Start simple: test a single filter in various lighting, then expand your kit as you gain experience with IR filter photography.
Infrared Filter Photography Techniques
Shooting with an infrared camera filter is unique—composition, focus, and exposure work differently than in regular photography. First, always compose and focus before attaching your IR filter, since most are nearly opaque. Autofocus may struggle; manual focus is often more reliable, especially if you use live view with focus peaking or magnification.
Set your camera to shoot RAW, as this maximizes your editing flexibility. Infrared photography often requires longer shutter speeds, so a tripod becomes essential for sharp results. Experiment with ISO settings: on older sensors, stick to low ISO for less noise, while some modern cameras can handle ISO 400–800 without trouble in infrared filter photography.
White balance is another challenge. Standard presets turn your images red or magenta. Custom white balance is key—shoot a gray card or a patch of green grass with the IR filter on, then set this in your camera for more natural tones during editing.
Finally, bracket your exposures. Infrared scenes can have extreme contrast, so try underexposing one shot and overexposing another. This gives you more options for post-processing and helps avoid blown-out skies or crushed shadows, a common hurdle with IR filter photography.
Editing Infrared Images
Post-processing is where the magic of infrared filter photography comes alive. Begin by correcting the white balance using the custom preset set in-camera or adjust in RAW software. Many editors like Adobe Lightroom or Capture One can handle IR files well. Use the temperature and tint sliders to neutralize harsh color casts.
Channel swapping is a popular technique if you want surreal blue skies and white foliage. In Photoshop, swap the red and blue channels for that signature infrared look. Further tweak hue and saturation to fine-tune the dreamy palette unique to images made with an infrared camera filter.
If you prefer black and white, convert with careful contrast adjustments, using curves and selective dodging or burning. This brings out the dramatic tones that infrared photography is known for. Sharpening and noise reduction are also important—infrared images sometimes appear softer or grainier, especially with high ISO or budget IR filters.
As you refine your workflow, keep backup copies of your RAW files. Editing infrared takes patience and experimentation, but with each session, you’ll get closer to mastering the full creative power of your infrared filter.