Under the Milky Way: How to Find, Shoot, and Plan Night Sky Photos
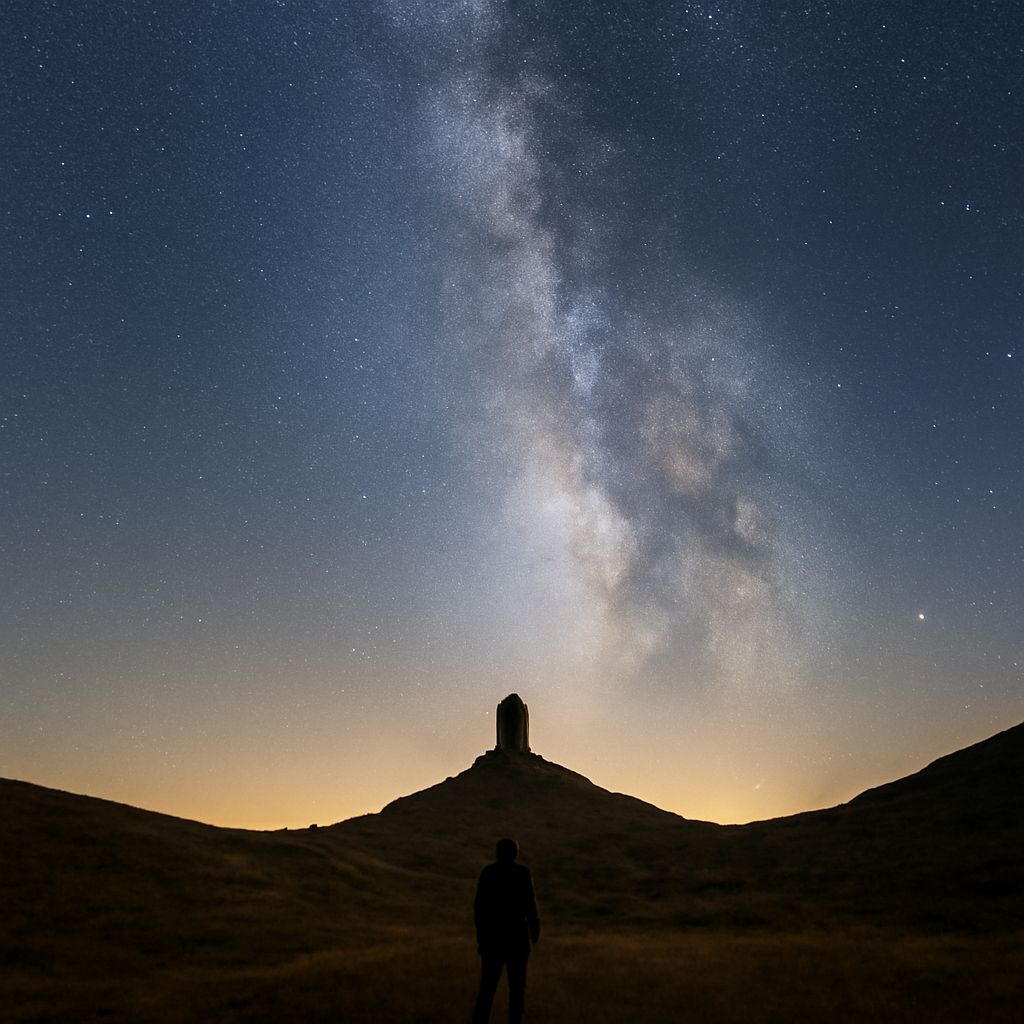
Standing under the milky way on a clear night in a dark sky location is one of the most disorienting and beautiful experiences you can have outdoors. The galaxy arches overhead in a river of light that cameras capture far better than the naked eye — and that’s the appeal. Knowing milky way tonight visibility in your area, finding the right location, and dialing in your exposure settings lets you go from hopeful to consistent.
This guide covers how to predict when you’ll be under the milky way tonight with your camera ready, the best locations including yosemite milky way spots, and how to capture a milky way panorama worth printing large.
Planning Your Milky Way Session
When and Where the Core Is Visible
The Milky Way galactic core is visible in the Northern Hemisphere from roughly March through October. Peak season is June and July when the core rises high enough above the horizon to clear foreground haze and light pollution. Check apps like PhotoPills, Stellarium, or Sky Guide to see exactly when you’ll be under the milky way at your chosen location on any given night.
New moon phases are your best window — the two weeks centered on the new moon give you the darkest skies. A bright moon washes out the fainter stars and reduces the core’s contrast significantly. Plan your session for the 10–12 days around a new moon during core season.
Location and Light Pollution
Light pollution is the biggest enemy. Drive at least 1–2 hours from any major city. Light Pollution Map (lightpollutionmap.info) shows Bortle scale ratings for any location. Aim for Bortle 3 or lower — those dark blue and gray zones on the map. National forests, BLM land, and state parks often provide excellent access to dark skies.
The yosemite milky way experience draws photographers from around the world. Glacier Point and Olmsted Point are popular spots, but permit requirements for Glacier Point vary by season. Check the park’s current reservation system before planning a yosemite milky way night shoot — some overlooks now require advance parking permits even after dark.
Camera Settings for a Milky Way Panorama
Wide-angle lenses between 14mm and 24mm give you the field of view to capture the full core arc. Use the 500 rule to calculate your maximum shutter speed before stars trail: divide 500 by your focal length. At 20mm, that’s 25 seconds. At 14mm, it’s about 35 seconds.
Set aperture to your lens’s widest — f/1.8, f/2, or f/2.8. ISO 3200 is a good starting point. Review your histogram and pull back to ISO 1600 if highlights are clipping, or push to 6400 if the image is too dark. Shoot RAW for maximum flexibility in post.
A milky way panorama requires multiple overlapping frames stitched together. Shoot 5–9 vertical frames with 30–40% overlap, using the same settings throughout. Lightroom and PTGui both handle stitching well. The final panoramic file can be printed at 48 inches or wider without quality loss.
Timing Your Shot Under the Milky Way Tonight
Arrive at your location 30–45 minutes before the core rises to let your eyes adapt to darkness. Keep your phone screen on red light mode only — white light destroys night vision for 20–30 minutes. Point a headlamp at the ground, never at the sky or at other photographers.
The core typically peaks at 2–3 AM during summer months at mid-latitudes. Stay until the core begins to descend toward the horizon, or catch it as it rises for a different angle on the same milky way tonight sky.
Key takeaways: Plan your milky way session around the new moon, find a Bortle 3 or darker location, and use the 500 rule to keep stars pin-sharp. A milky way panorama across 5–9 vertical frames gives you a print-worthy image that captures the full sweep of the galaxy above any landscape.